12 DIY Advent Calendar Ideas to Count Down to Christmas
A store-bought advent calendar is gone in a few weeks. A homemade one can hold notes, tiny toys or treats, hang on a wall or ladder, and come back out year after year.
These DIY advent calendar ideas come from real homes and range from a simple string of paper bags to a reusable felt hanging. Pick one that fits your space, your time and who will be opening it.
How to choose an advent calendar project
Start with what you already have
Materials: Paper bags, leftover fabric, a blanket ladder or a spare picture frame can become the structure, so you are not buying a full kit.
Match the project to your time
Skill level: Clipped bags and numbered envelopes can be finished in an evening. Sewn stockings and felt pockets take longer but can be reused.
Keep the look consistent
Palette: Choose one material and a simple color story, such as kraft paper and twine or mixed denim, so 24 little pieces still read as one calendar.
Give it a dedicated spot
Display: Hang it on a wall, door, ladder or inside an unused fireplace opening where it is easy to reach each day and will not be bumped in a hallway.
1. Aqua Mason Jars Hung on a Wooden Ladder
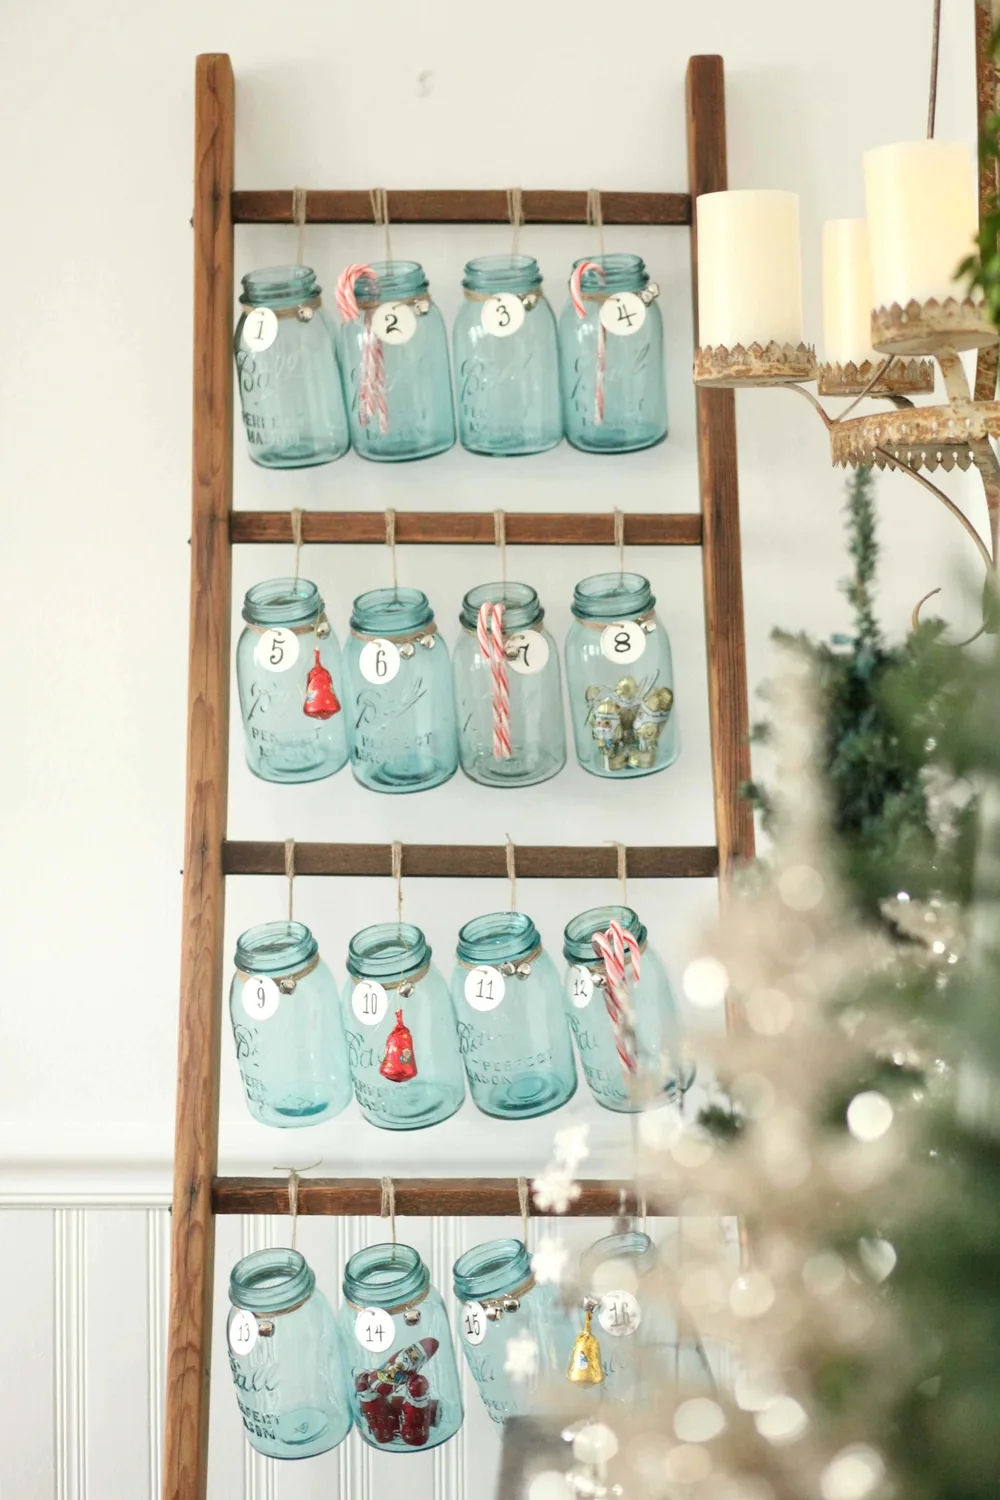
Idea formula: blanket ladder + mason jars + numbered tags
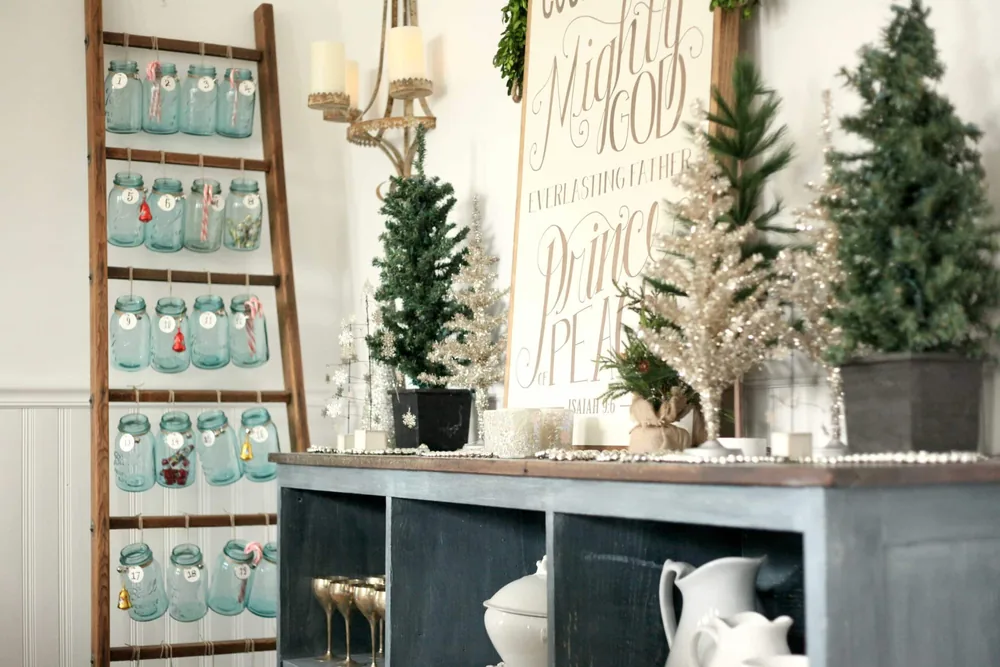
Aqua mason jars hang from the rungs of a wooden blanket ladder, each one tagged with a number and tied with twine and a small jingle bell. Candy canes, foil-wrapped chocolates and tiny ornaments show through the glass, so the countdown is part of the decoration.
What you need: A sturdy leaning ladder, 24 jars, twine, number tags and something small to fill each jar.
Display tip: Set the ladder where it cannot be knocked over, and keep glass jars out of the path of toddlers and pets.
2. A Paper Bag Tree on the Wall
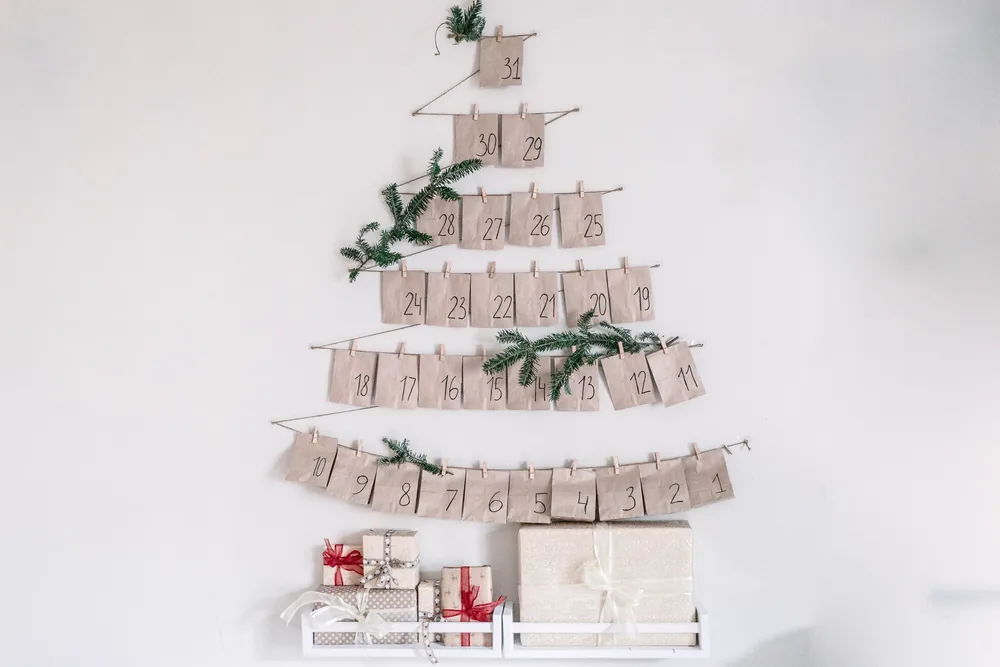
Numbered kraft bags are clipped to rows of twine in the shape of a tree, with a few sprigs of greenery tucked in and wrapped gifts on a narrow shelf underneath. This version is numbered through 31, so the countdown can run all the way to New Year’s Eve if you want a longer tradition.
Difficulty: This is an evening project: hang the twine, number the bags and clip them in shorter rows as you go up.
Renter-friendly: Use removable hooks or clips so you are not putting nails in the wall.
3. A Lit Envelope Calendar in the Fireplace Opening
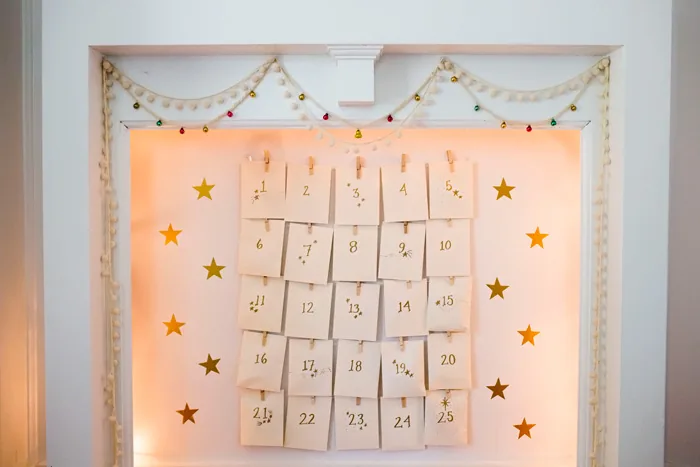
Cream envelopes numbered 1 through 25 hang in neat rows inside a white fireplace opening, backlit so the paper glows. Gold star decals and a soft pom-pom and bell garland frame the grid, which turns an unused opening into the countdown itself.
Display tip: Use a flameless light source behind or around the envelopes, never an open flame near paper.
Make it yours: If you do not have a fireplace, a large empty picture frame or a bookcase opening can hold the same grid.
4. Tiny Muslin Bags on a Weathered Board
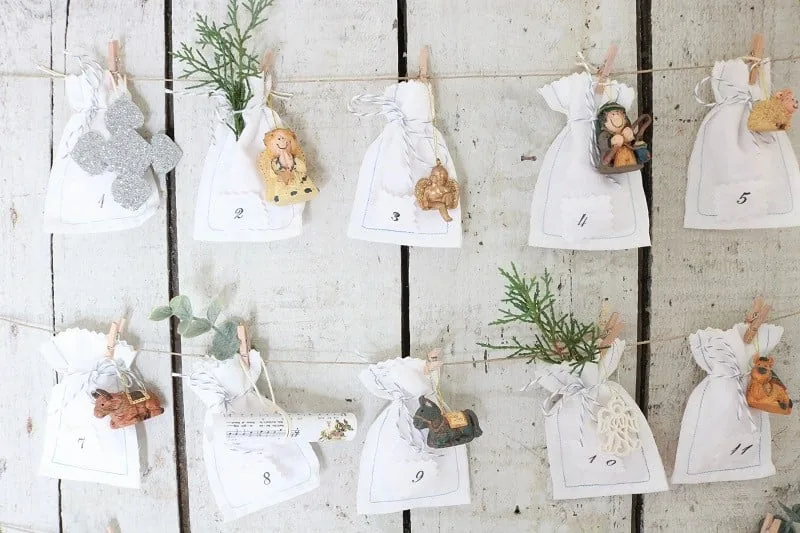
Small white muslin bags with simple handwritten numbers hang on twine against weathered white wood. Tiny figurines, a scrap of greenery and a rolled paper tucked into one bag make each day feel like a little package instead of a flat envelope.
Budget note: Plain muslin bags, twine and clothespins are inexpensive and can be packed away and reused.
Make it yours: Fill the bags with a mix of notes, tiny toys and treats rather than candy alone.
5. Denim Mini Stockings on a Branch Tree
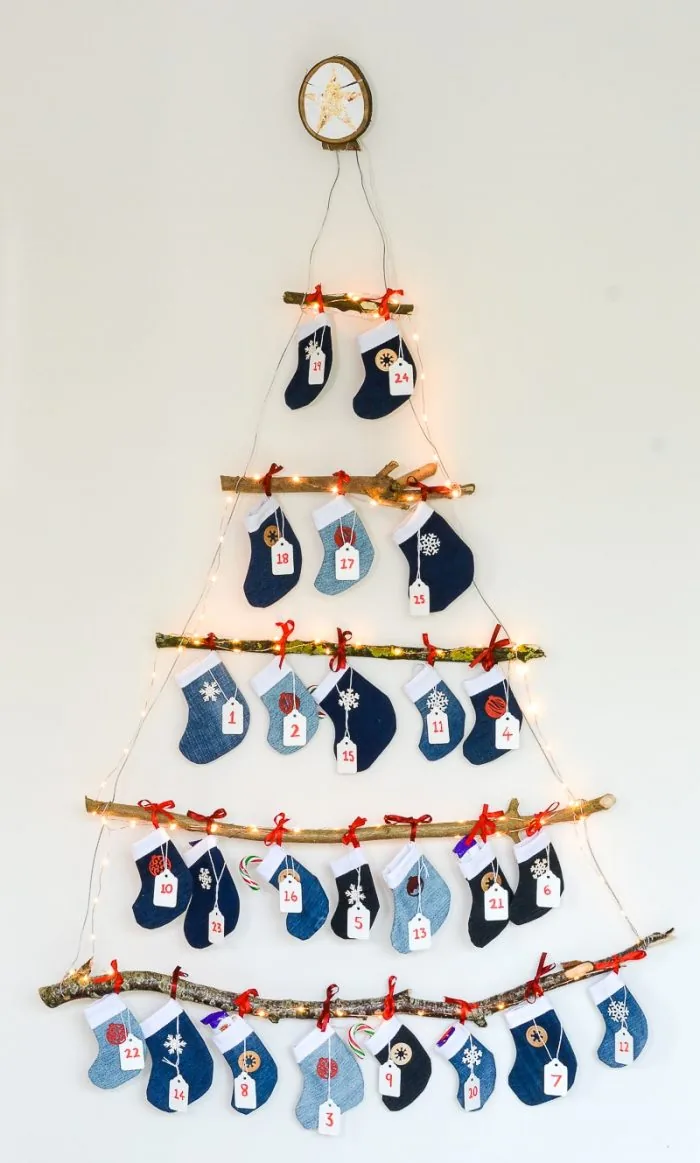
Mini denim stockings with white cuffs hang from uneven twig branches, each one tied with a red ribbon and a numbered tag. Fairy lights outline the tree shape, and snowflake and button details make this a calendar you can fold up and bring out again next year.
Difficulty: This takes more time than a paper version because each stocking is sewn or glued, but the branches and lights become the display.
What you need: Scrap denim, a simple stocking template, tags, thin branches and a strand of warm lights.
6. A Colorful Felt Pocket Wall Hanging
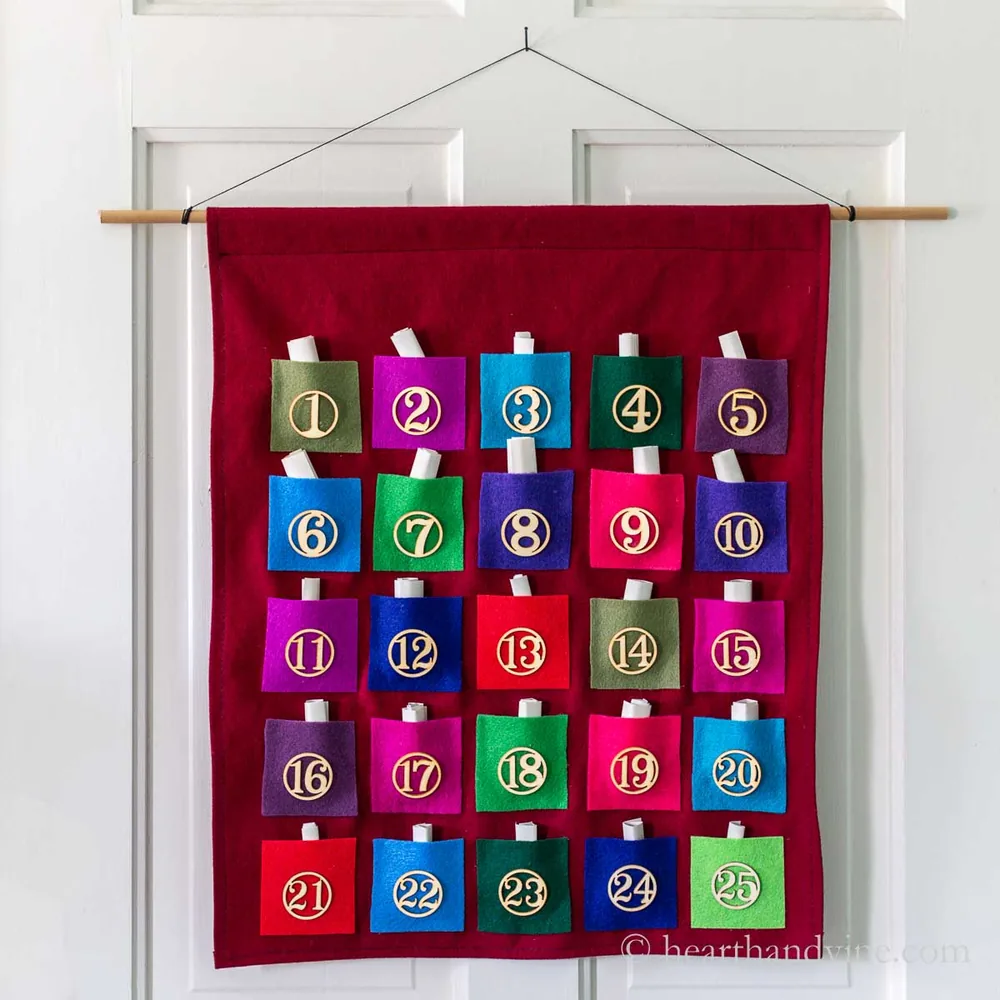
A red felt panel hangs from a dowel on a white door, with 25 colorful felt pockets labeled by wooden number discs. Rolled papers peek out of the pockets, so this one is especially good for activity ideas, notes or slim treats you can swap each year.
Time: Cutting, stitching or gluing the pockets is a weekend project, but you can fill it again every December.
Display tip: A door or a clear stretch of wall keeps the hanging flat and easy for little hands to reach.
7. An Upcycled Wood Frame Filled with Bags
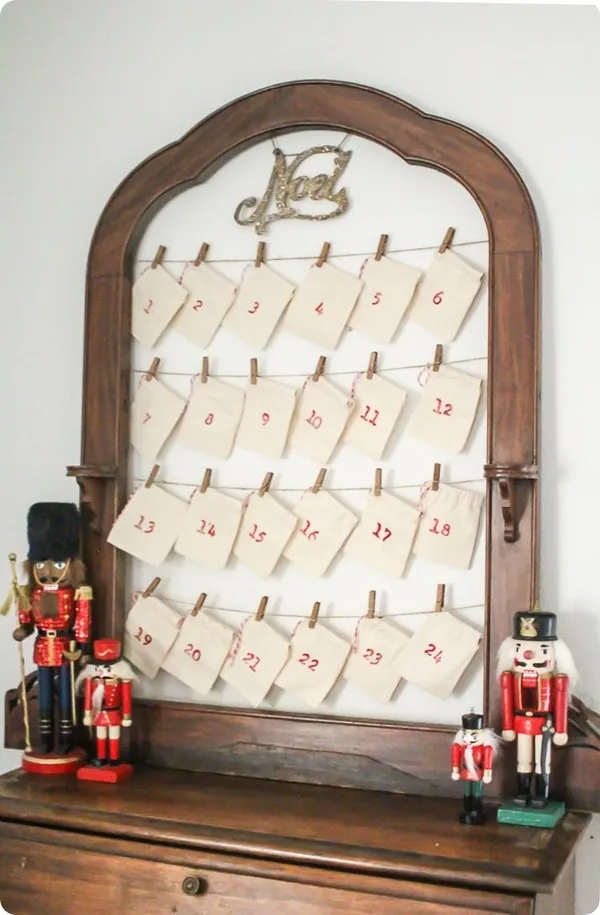
An arched wood frame, the kind that might once have held a mirror, now holds 24 cream drawstring bags with red numbers, topped with a simple Noel sign. Nutcrackers stand on the base, so the calendar looks like a piece of furniture rather than a craft project.
Budget note: A thrifted frame or the back of an unused mirror plus inexpensive muslin bags is the whole structure.
Style note: This works well in an entry or dining room where you already display a few holiday figures.
8. Paper Sacks with Peppermint-Striped Clothespins
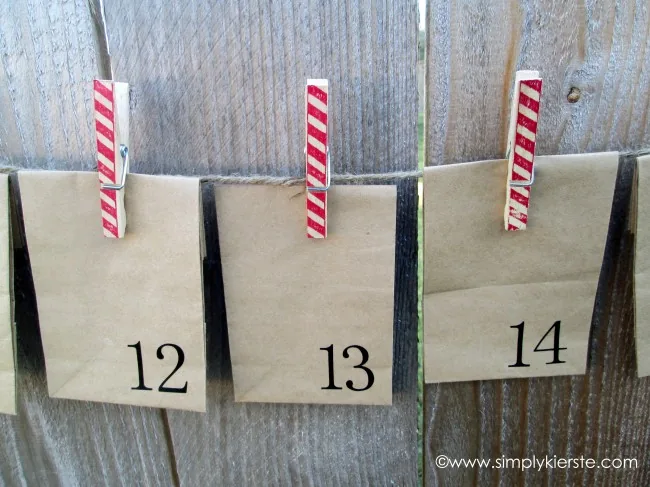
Plain brown paper sacks with clear black numbers are clipped to twine with red-and-white striped clothespins. The close-up shows how little decoration you need: kraft paper, twine and a peppermint-striped clip already feel like Christmas.
Difficulty: This is one of the fastest options: number the sacks, fill them, fold the tops and clip them to a length of twine.
Display tip: Hang the twine across a doorway, along a stair rail or in front of a wide window so the whole row can be seen.
9. Paper Bags Finished with Gold and Silver Doilies
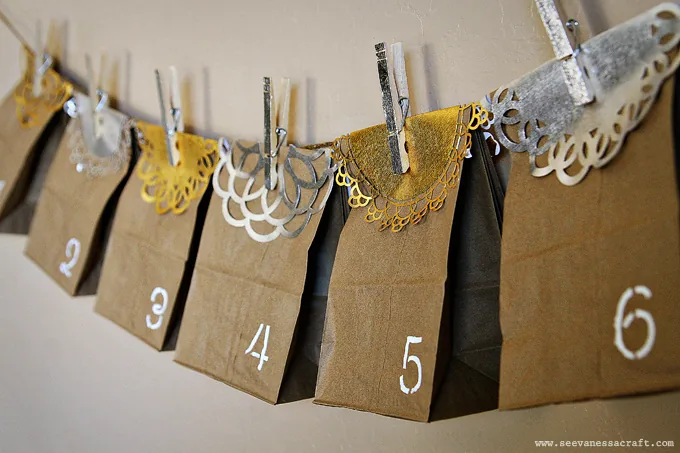
Brown paper bags with stenciled white numbers hang from a simple line, but folded gold and silver doilies along the tops make them feel dressed up. Wooden clothespins hold everything in place, so this is still an easy project with a more finished look.
What you need: Paper bags, number stencils or stickers, inexpensive paper doilies and clothespins.
Make it yours: Use 12 bags for a shorter countdown if 24 feels like too much to make at once.
10. A Matchbox Tree on a Cookie Sheet
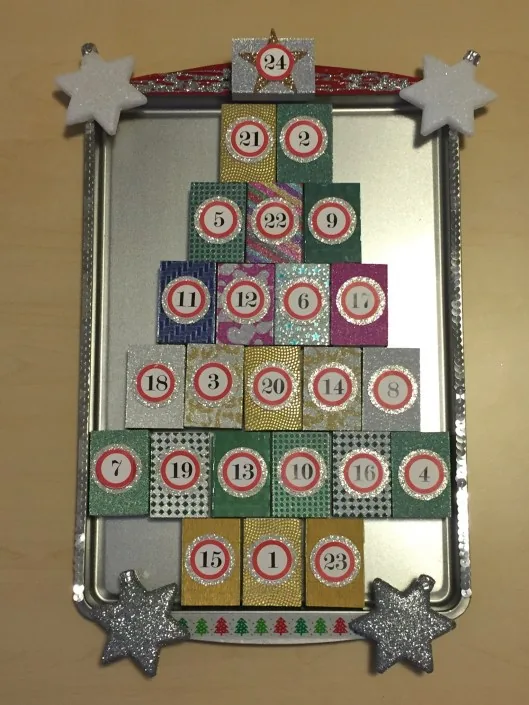
Small boxes wrapped in leftover patterned paper are stacked into a tree on a metal baking tray, each one labeled with a circular number. Glitter stars sit at the corners and a 24 star tops the tree, which can lean on a counter or hang if you add a ribbon.
Budget note: Matchboxes or leftover gift boxes, scrap wrapping paper and a tray you already own keep this inexpensive.
Best for: A kitchen counter, desk or fridge-adjacent wall where a flat tree will not take up floor space.
11. A Weathered Ladder with Kraft Bags and a Boxwood Wreath
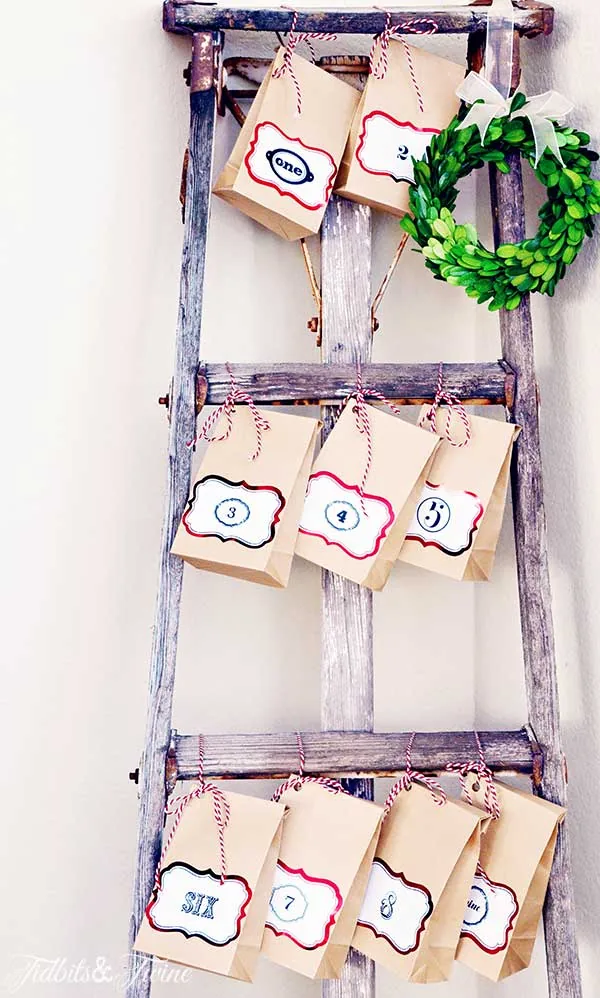
Kraft bags tied with red-and-white baker’s twine hang from a weathered gray ladder, some labeled with numerals and some with written numbers such as “one” and “SIX.” A small boxwood wreath with a white bow at the top turns a plain ladder into a full entry display.
Style swap: If you do not have an antique ladder, a simple wood or blanket ladder with the same bags will work.
Display tip: Lean the ladder in a corner so the bags hang freely and no one has to walk around it.
12. Toilet-Paper-Roll Trees the Kids Can Make
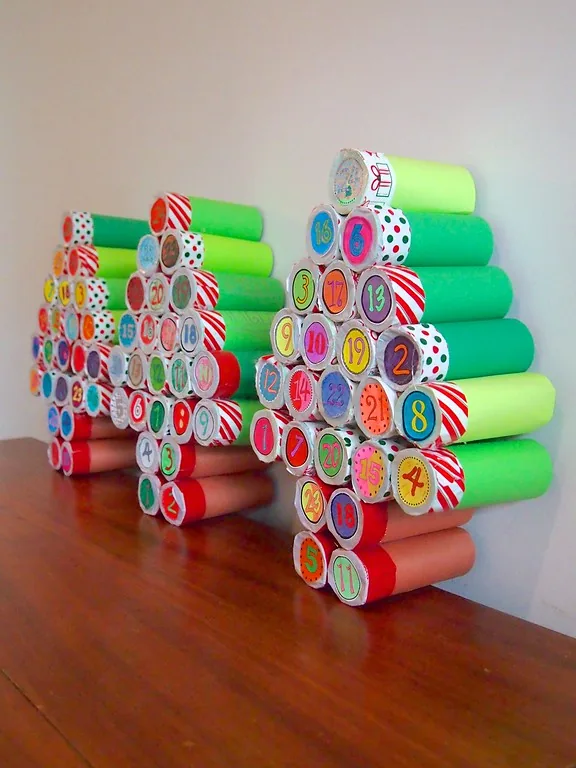
Cardboard tubes are stacked and glued into tree shapes, with the open ends facing forward so each one becomes a little cubby. Bright numbered circles close the ends, and the mix of painted green rolls and patterned papers makes it clear this is a project kids can help build.
What you need: Saved toilet-paper or paper-towel rolls, glue, paint or scrap paper and number stickers or a printable.
Difficulty: This is a good weekend project with kids; an adult should handle the glue structure so the tree stands securely.
Choose a structure you can store, fill the pockets with notes or small surprises, and hang it where everyone can reach it. For more handmade holiday projects, see our Christmas craft ideas, our DIY Christmas decor ideas and our DIY gift wrapping ideas for Christmas.